
How you interact with your customers says a lot about your business!
When you build an ecommerce website, you’re hoping that potential customers come to your website, view your products, add to cart, complete the checkout process, pay and place an order, and voila! Your job is done! Is it, though? Sure, if your ecommerce website is powered by WooCommerce you may have a default ‘Thank You’ page that pops up after the order is placed – but what if you can personalize your ‘Thank You’ page to let your customers know you genuinely appreciate them and hopefully convince them to keep coming back for more and more.
Why do you need a custom ‘Thank You’ page? You can use the Thank You page as another opportunity to drive more sales with a custom message, a promotional code, an exclusive discount coupon or even ask your customers to shop more.
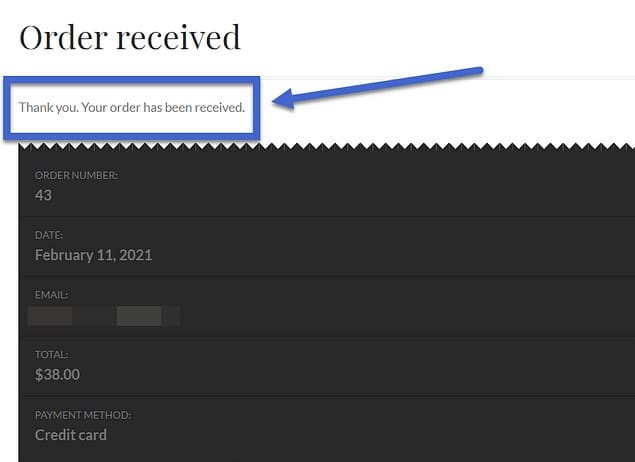
A Thank You page comes up after a customer completes placing an order. The default page is basic and lacks creativity any opportunity to grab the customer’s attention or convince them to come back for more. Here’s what a default page typically looks like:
However, by adding colour, creative text, and some extra elements you can customize your Thank You page and in return grow sales, build customer loyalty, offer a better customer experience and a lot more. To give you a glimpse, compare this Thank You page to the one above:
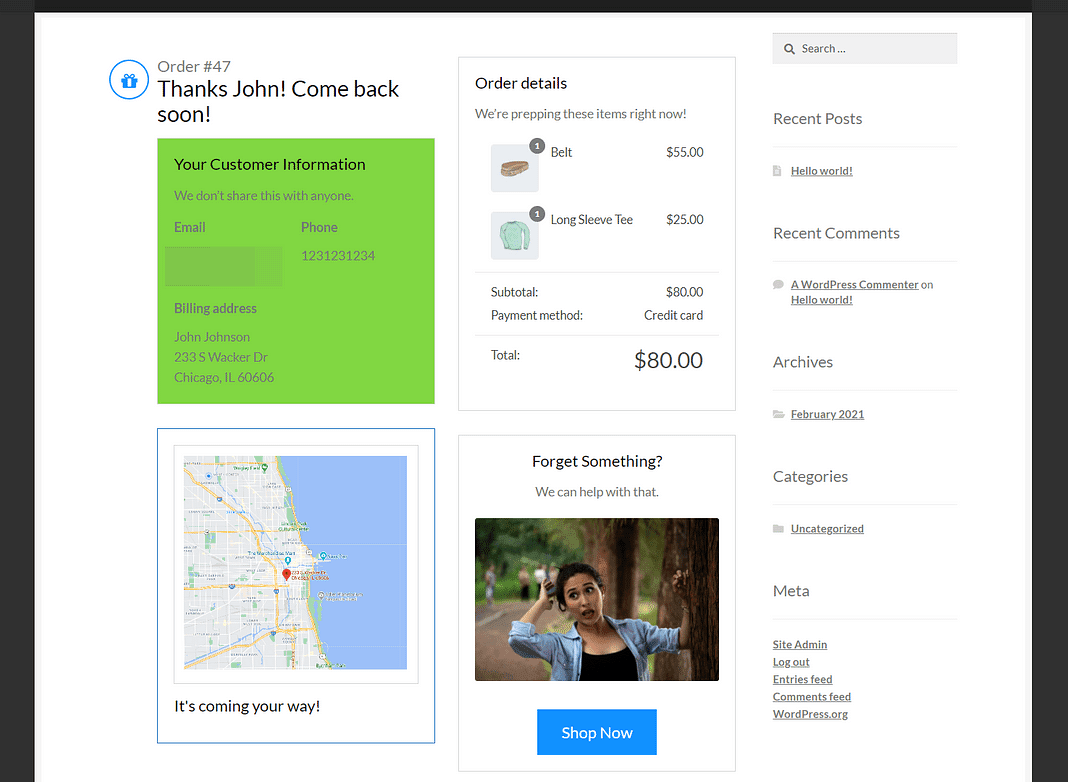
This customized Thank You page above has many elements that can engage a customer, even beyond the order placement.
Much better, isn’t it?
Okay, so now that we’re on the same (Thank You) page, let’s get started!
Step-by-Step Instructions to Create a Custom Thank You Page
To build a custom page you have two options. Use coding to build it from scratch or use a plugin that does all the work for you. With WordPress, you have the easier, faster and simpler version to use plugins to add whatever pages, forms or functionality you need.
It is important to have essential WordPress plugins to customize your ecommerce website and add all the functionality your online store needs and must have. To create your custom Thank You page you can use the NextMove Lite plugin.
In this tutorial, we are going to show how you can create a custom Thank You page with this plugin.
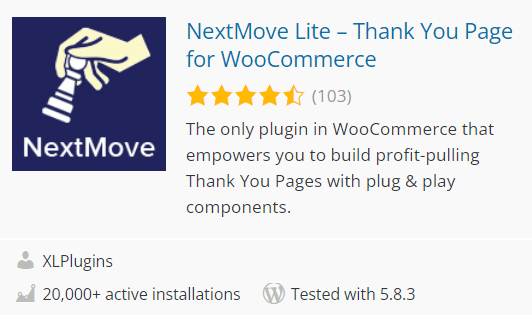
With the plugin you can add several features and elements to your page, making it more convincing and giving you a well-branded page. Just install and activate the plugin, and you can start customizing your Thank You page.
To edit the page and make it completely on-brand, login to your WordPress dashboard and go to WooCommerce > Settings

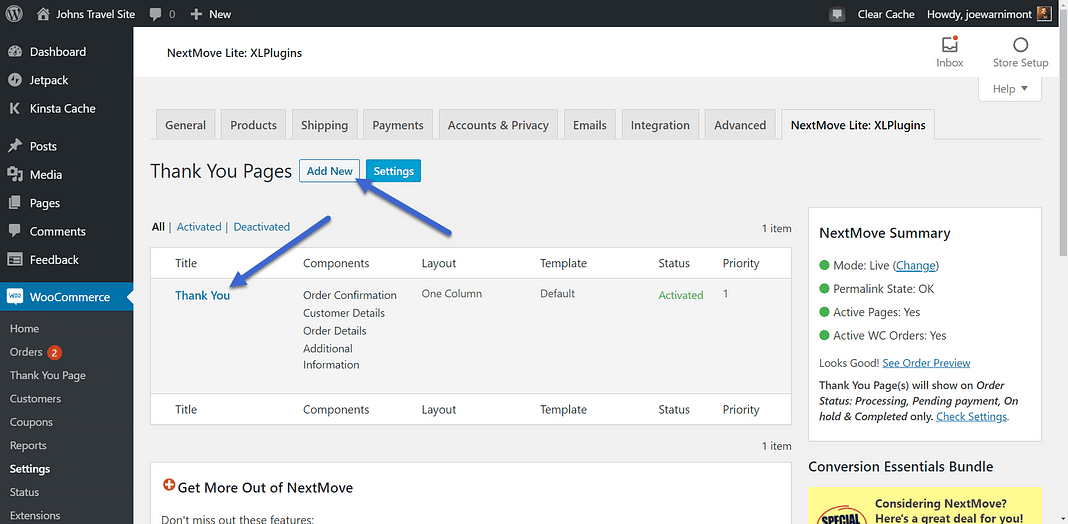
Once you have successfully installed and activated the NextMove Lite plugin, you should be able to see a tab for it here:
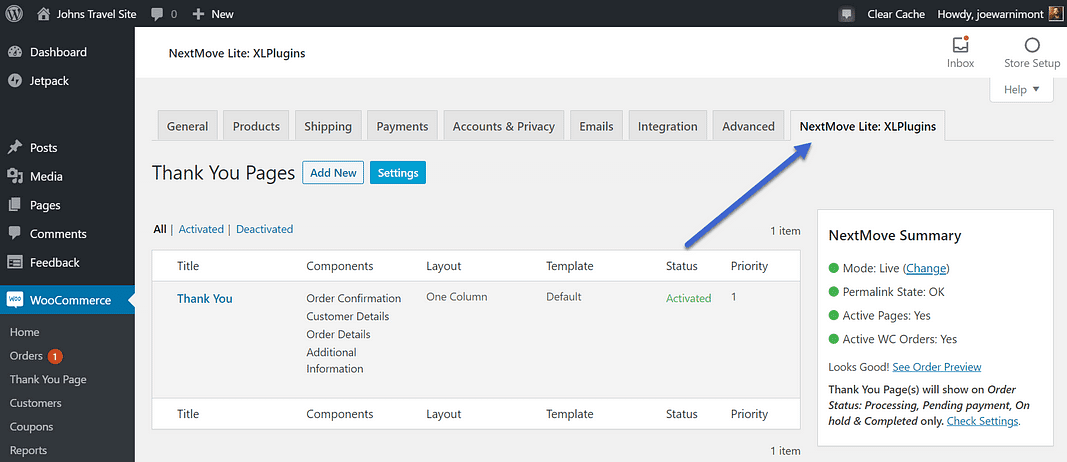
You can view the existing active Thank You page, see order preview, and edit it or create a new Thank You page, by clicking on Add New:
The plugins visual page editor is divided into four steps:
- Select components
- Edit components
- Choose layout
- Arrange components
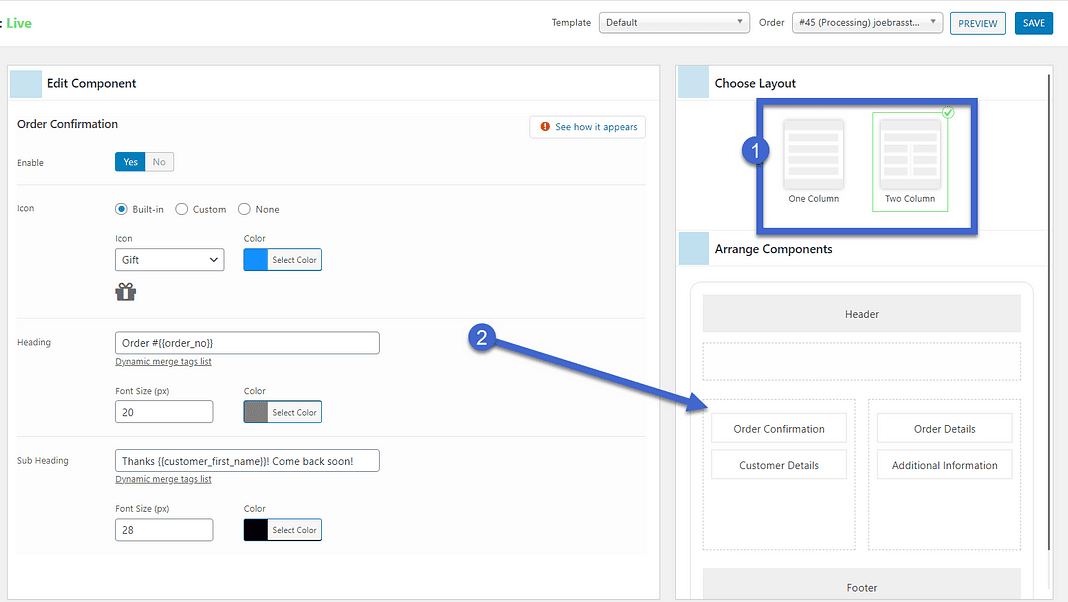
To begin customizing your Thank You page go ahead and click on Order Confirmation
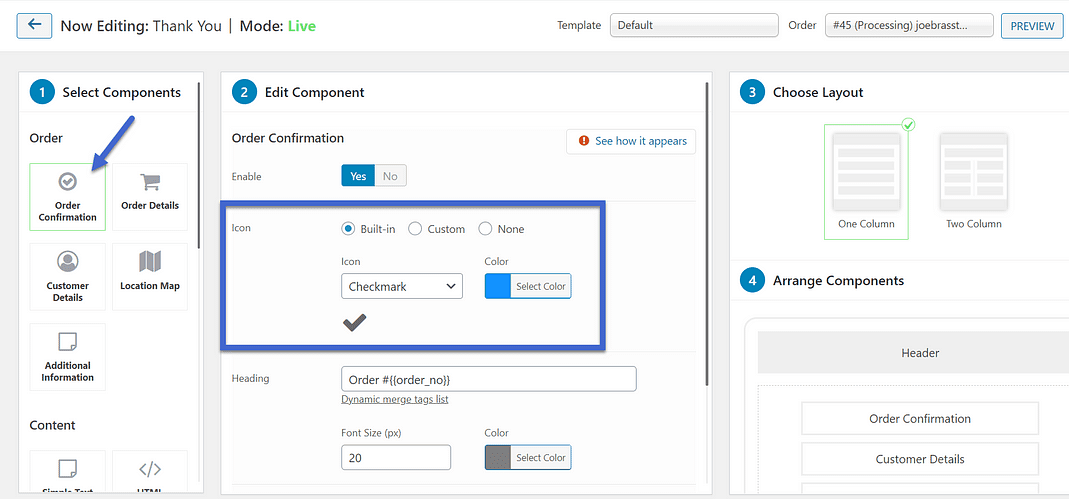
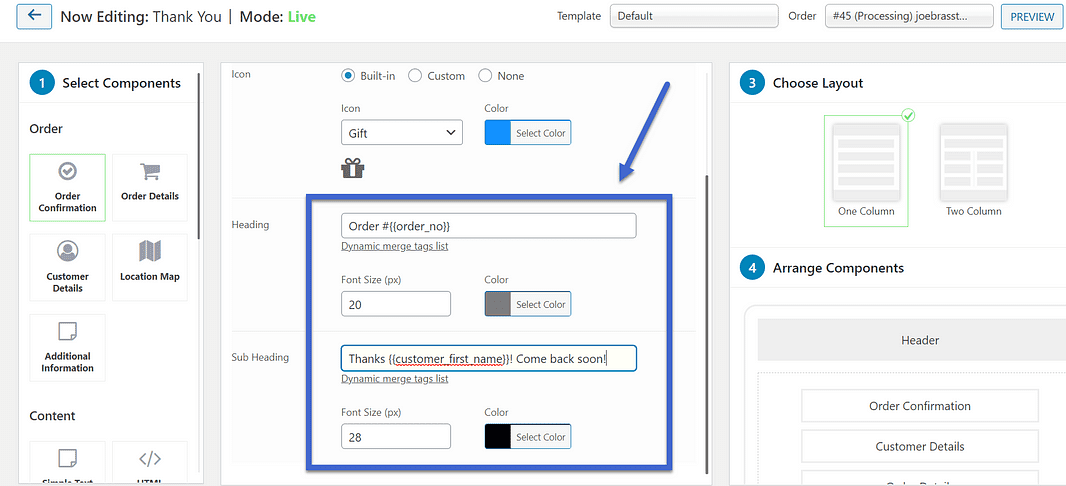
Here you can edit headers, change icons, choose background colours, change headings, add a custom Thank You message and even personalize by adding the customer’s name.
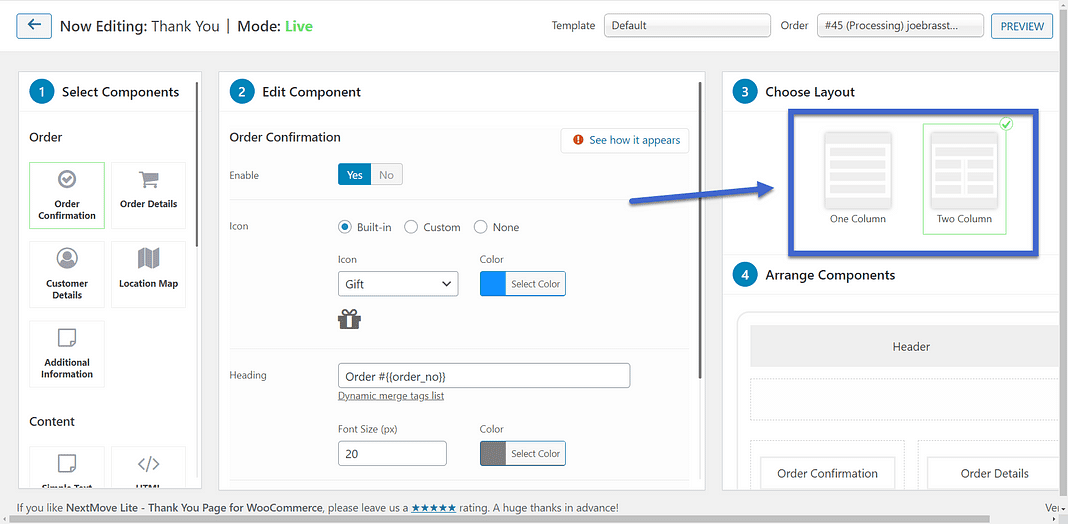
Once you are happy with how the order confirmation looks and reads, go ahead and pick a layout for your page, whether you want a one or two-column layout, from Choose Layout:
Now go ahead and Arrange Components to create an effective Thank You page:
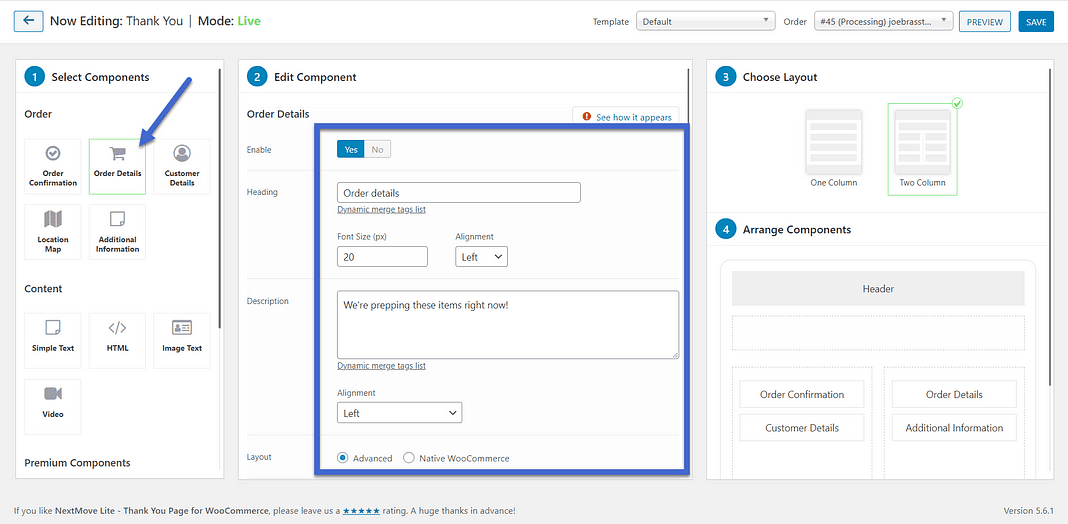
We now move on to Order Details and choose our heading, description, layout, etc. We also have the option to enable or disable any element.
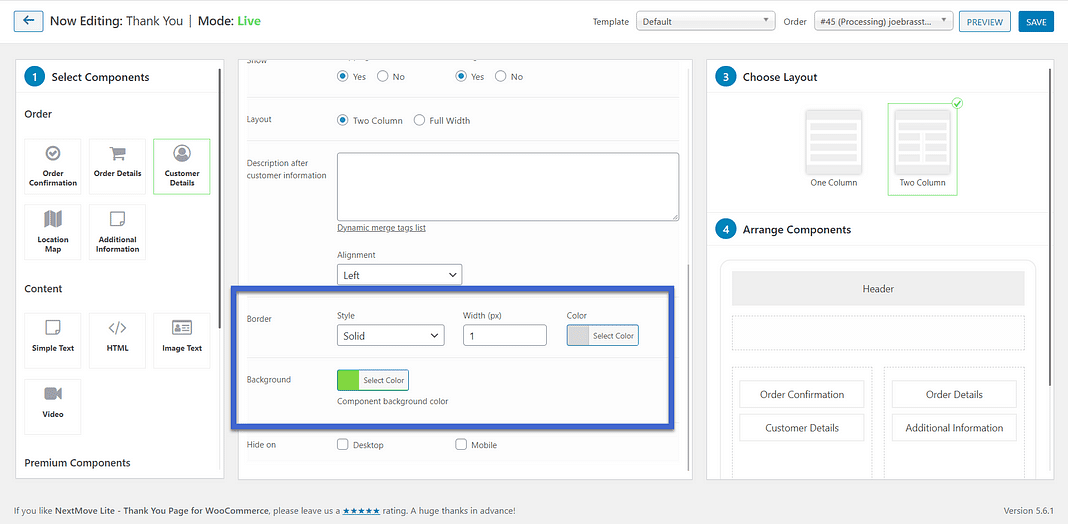
On Customer Details, the customer’s name and address pop up. Here you can add a personalized heading and description, like ‘We don’t share this information with anyone!’ You can also change the colours for this element on your Thank You page, so it stands out and draws attention.
You can then add a Location Map with a customized header and play with fonts and colours here.
The Content section lets you play around with Simple Text, Image Text, HTML and Videos. You can add an extra element of content in different formats to make the page more engaging.
For example, you could add an image that asks customers to continue shopping, give them an additional discount code when they place their next order etc. You can further buy the premium components of the plugin to further customize the page.
After all these easy steps, you can build a highly customized and personalized Thank You page for your online store. Here’s an example:
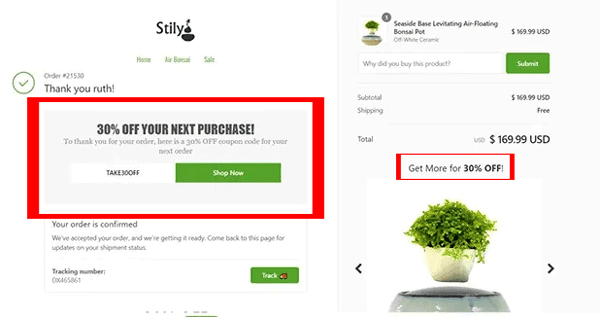
You see how this page not only thanks the customer for placing an order but gives them a 30% off on the next purchase. This is an effective way to persuade people to continue doing business with you.
Key Elements to Consider When Building Your Thank You Page:
- Add a button asking people to ‘Shop More’, ‘Go Back to Shop’, ‘Continue Shopping’
- You can add links to collect Feedback or Reviews or link to Instructional Videos
- Add Images or Videos and use different colours and fonts to give a well-branded personality to your page
- Include shipping information with maps or links to tracking
- Use the page to cross-sell and upsell other products from your online store
- You can add social sharing buttons to continue engaging with them across platforms
- If you have a newsletter, use this space to collect ‘Sign Ups’
- Offer discount coupons for future purchases
Thank You Page: Keep Your Customers Coming Back For More!
The Thank You page does not need to be the goodbye! You can use this page as an opportunity to build and strengthen long-term relationships with your customers. You can also use this page to show your brand personality, offer genuine appreciation and help and make sure you leave a positive impression.
For more tips on how to build and grow your ecommerce website, head to our WordPress Tutorials page.


Write A Comment